Setting Up the Fixed Assets Module
Step 1: Add the Module
Go to Administration>Organization Setup>Module Setup and click  . From here, the Add Module Wizard will walk you through setup for the Fixed Assets module. To learn how to set up a module in MIP Cloud, click here.
Step 2: Accounts and Codes Setup
Follow the diagram below to set up the accounts and codes your organization will be using with the Fixed Assets module. These accounts and codes must be set up before proceeding.
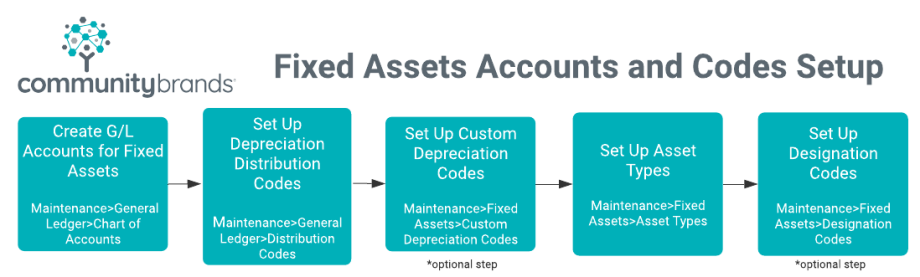
See the following Help site links for each step above:
To create G/L accounts for Fixed Assets, click here.
To set up depreciation distribution codes, click here.
To set up custom depreciation codes, click here.
To set up asset types, click here.
To set up designation codes, click here.
Note: When creating General Ledger accounts for Fixed Assets, make sure to include a depreciation account (an EXP type account), an asset account (FAO type), an accumulated depreciation account (FAO type), and a gain/loss account (for disposals). Click here for help with the Chart of Accounts form.
Step 3: Set Up Default Information
Once you’ve added the module and set up your accounts and codes, go to Administration>Organization Settings>Module Setup>Fixed Assets to continue the module set up. This page displays the Fixed Asset default fields, and Quick Entry options to speed up your asset entry.
Fixed Asset Defaults

Fields marked with an asterisk are required. Establish default values for your assets:
|
Frequency |
|
|
Gain/Loss General Ledger Account |
Select a general ledger revenue or expense account from the drop-down list. You must have previously added at least one account in your Chart of Accounts to make a selection. |
|
Default Asset Type |
Select a default asset type. This asset type will auto-populate anytime you create a new asset, either through the Fixed Assets module or using the Asset Quick Entry form within other modules.
|
|
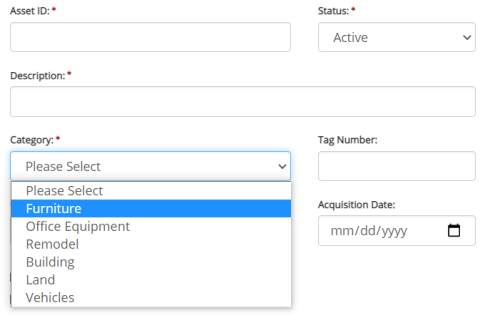
Default Category |
Select a default category. This category will auto-populate anytime you create a new asset, either through the Fixed Assets module or using the Asset Quick Entry form within other modules. What is the difference between Categories and Asset Types?
What is the difference between Asset Types and Categories?Asset types have multiple accounting codes linked to them. This means that an asset's type will affect calculations and will impact your general ledger. See the image below for an example of the codes associated with asset types.
Categories are used for reporting purposes, to group assets. Categories do not have any accounting codes associated with them. You can create categories when adding new assets into the system (through Maintenance>Fixed Assets>Fixed Assets>Add Asset).
Note that categories created in the Fixed Assets module cannot be utilized in other modules (such as Purchase Orders and Electronic Requisitions). |

Asset Quick Entry Options
You can choose to include additional fields when creating an asset via Quick Entry.

Include Life
Select this option if you want to include the Life column when creating an asset via Quick Entry. This is helpful if you know the useful life of an asset and want to enter it right away.
Turn On Validations
Select this option if you want to turn off the validations that confirm the cost of the asset is tied to the Transaction Entry document, and that the transaction is linked to a fixed asset (FAO) type account.
Note: When creating an asset using a Quick Entry form, a zero book value asset is saved when the Cost is entered as zero and the "Turn On Validations" check box is selected.
Step 4: Get Started
After setting up the Fixed Assets module, go to Maintenance>Fixed Assets>Assets to start entering assets into the system - see Adding New Assets for more information.
Click here to return to the Fixed Assets help homepage.